
CSpeak - User Guide
Launching the CSpeak Client
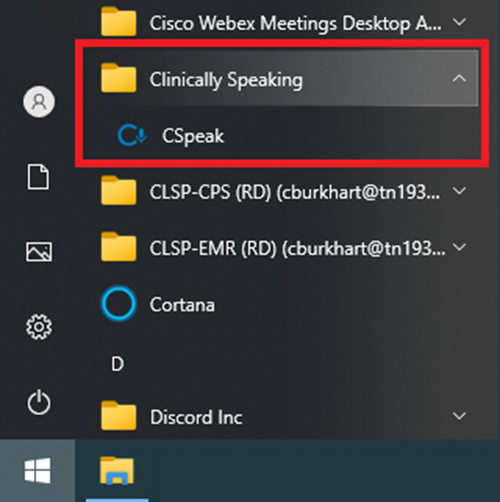
As part of the CSpeak installation, the MSI installer will place a shortcut to the CSpeak client in the start menu of Windows. The folder is named, “Clinically Speaking”, with the shortcut named, “CSpeak”. Once you have located the shortcut you can pin this to the start menu, taskbar, or send it to the desktop.
Command Line Arguments
Argument | Description |
e: | Allows you to specify the email address on the log in window. Example: “e:hwinston@clinicallyspeaking.net” |
Logging into the CSpeak Client
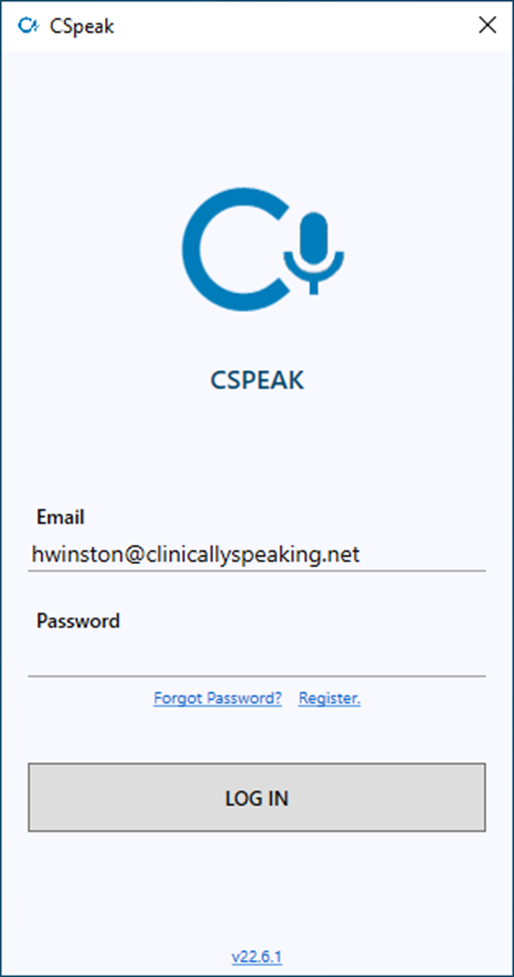
The first window you will be shown after launching CSpeak is the authentication window. This window has a handful of features to help you get into your account. If you know your password you can enter your email address and password and then click the button, “LOG IN”. If you have forgotten your password you may click on the link, “Forgot Password?”. You will be prompted to enter your email address as part of the recovery process. If an account exists for the provided email address a new temporary password will be sent to the email address.
First Time Setup
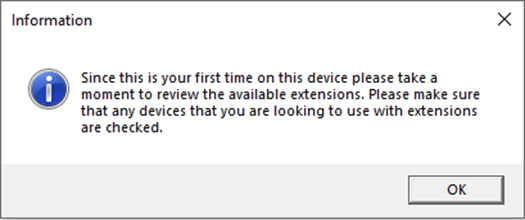
The first time you log in to a CSpeak client on a new device you will be taken to the extensions content page and be asked to confirm what extensions you are going to be using. It is strongly recommended that you enable any of the extensions for applications that may want to dictate into. These settings can be changed at any time if you would like to modify your setup later.
Accessing the CSpeak Settings Window
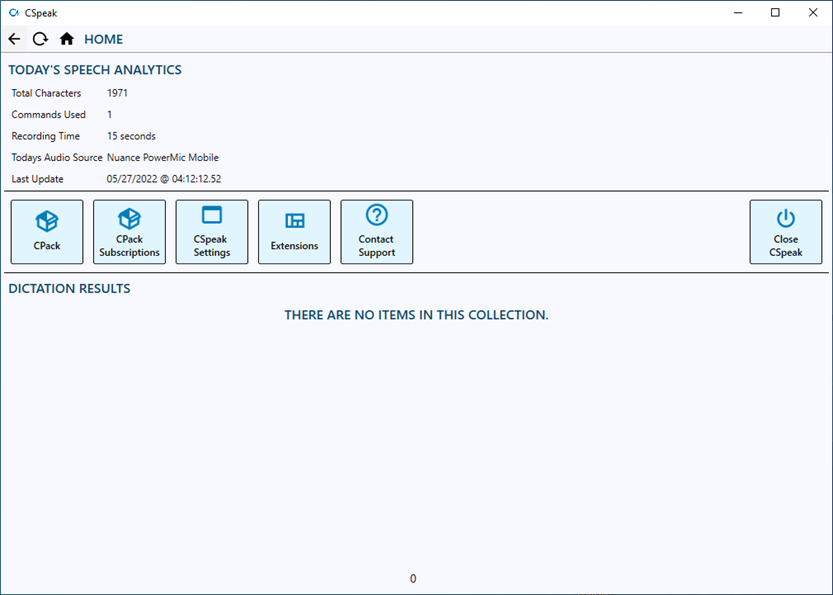
To access the settings window all you must do is click on the CSpeak icon found on the task bar.

The Speech Bar
After you log in to CSpeak you will be presented with the speech bar. The speech bar is the interface that allows you to manage most things that involve dictating.
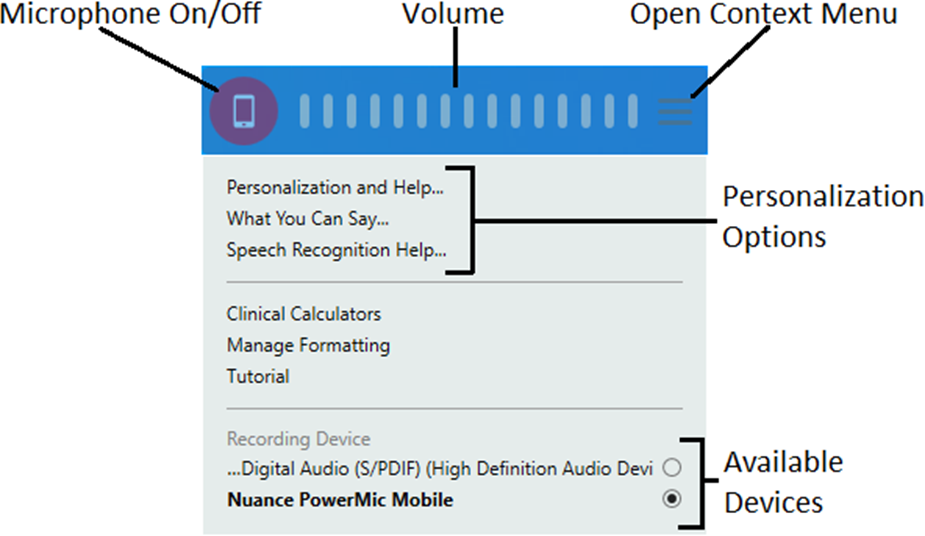
Microphone On/Off
This toggle button allows you to manually turn the microphone on and off.
Volume
This meter displays the current volume of the dictation that is collected by CSpeak.
Open Context Menu
This push button allows you to open and close the options context menu on the speech bar.
Personalization Options
All these options will open the What-Can-I-Say (WCIS) menu. The individual options will take you to the specific area of the WCIS menu.
Available Devices
This radio button group allows you to change which microphone CSpeak will listen to when you are dictating.
Dictation Modes
CSpeak offers users a variety of ways to dictate into the EMR. These different workflows are referred to as dictation modes.
Auto Mode
By default, CSpeak is in the auto dictation mode. This mode will place the text results at the point of the cursor and will follow the cursor between multiple applications. In this mode the dictation box is not used as an intermediary window and is not shown. You can enter this dictation mode at any time by using the voice command, “Switch to auto”.
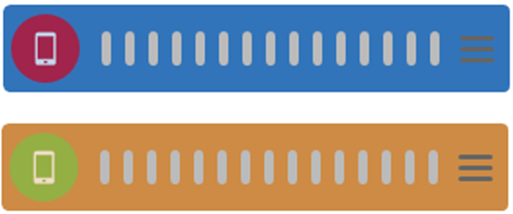
Focus Locking
This feature allows the user to lock and unlock the actively focused text control while dictating. The voice commands, “lock focus” and, “unlock focus”, can be used to perform these actions. When you lock focus on a text control you will see the speech bar’s color will become inverted.
While using the focus locking functions you may encounter a window that doesn’t have a direct insert text operation channel. Simply put this means CSpeak cannot send text directly to the window and instead sends text through an intermediary like the clipboard. In those cases, you will see a preview window appear on screen at the bottom center position. Once you are done dictating and processing has completed the focus locked window will be brought to the foreground and CSpeak will attempt to transfer the text.

Basic Mode
In this mode CSpeak will not track edit controls and will consider any edit control that it interacts with as a basic text edit control. The only means of transfer in this mode is with the clipboard.
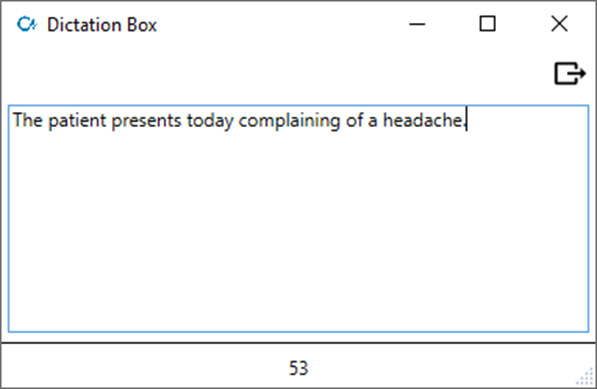
Dictation Box
The second dictation mode available in CSpeak is the dictation box. In this mode all dictation results are going to be inserted into a dictation box until you instigate the transfer text command. You can do this by voice command, hotkey, microphone button, or automatically by setting the dictation box mode to, “Express”. You can modify the dictation box properties in the CSpeak User Settings content page.
Chromium Web Browsers
If you are using a Chromium based web browser (e.g., Google Chrome, Brave, or Microsoft Edge) and you are using the Chromium Virtual UI extension, it is strongly recommended that you open the web browser first and then open CSpeak afterwards. We have found that the Chromium runtime doesn’t always activate the automation layer or extensions framework in a timely manner. To allow the web browser the most time possible to load, the most consistent way to use these web browsers is to open the web browser first and to then open CSpeak second. It is also strongly recommended that you practice good tab management. As more tabs are opened the available resources to the Chrome extension decrease causing the extension to respond more slowly.
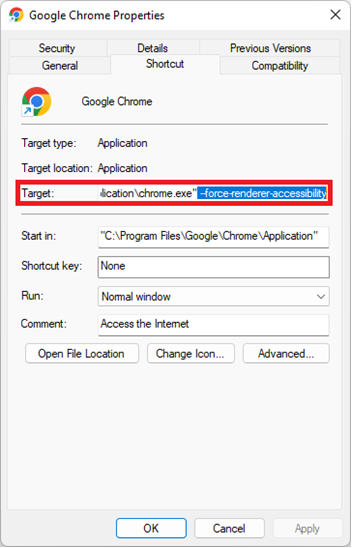
Shortcut Modifications (Optional)
An alternative approach is to modify your Chromium browser shortcut to use the flag, “--force-renderer-accessibility”. This flag will force the browser to enable the accessibility features available to Chromium. This flag can be added to the target property of your shortcut.
Incognito or Locked Down Windows
Please be aware that Chrome extensions do not function properly in incognito or locked down windows. Some EHRs have options to use these types of windows to enhance security. Unfortunately due to the restrictions on these types of windows, we do not advise that you use them and cannot guarantee functionality will be available if you choose to use them anyways.
Common Issues
Device Latency
The performance requirements for CSpeak are low. The process can run around 100 MB of memory and require only a few points of CPU usage. However, if your device routinely runs low on resources (e.g., CPU or memory) or experiences a spike in utilization by any common action, you may experience latency from the application including user interface locking. In general, it is a good practice to keep extraneous applications and processes out of memory. If you have any questions on this topic, please contact your local IT resource or the Clinically Speaking support team.
Poor Recognition
Common reasons for poor voice recognition accuracy can vary between technical and environmental factors, but we have listed some common issues below.
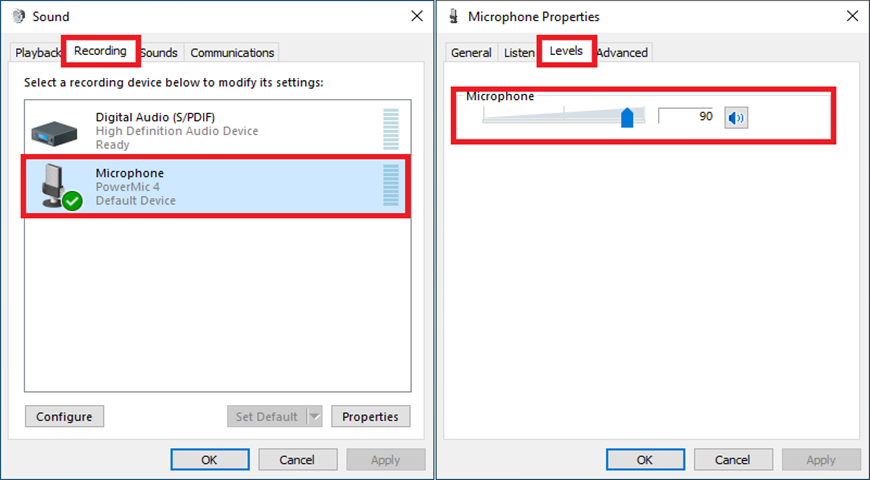
Low Listening Levels
If you do not see much movement on the speech bar’s volume meter you may have a low listening level. This can be caused by sudden loud noises being picked up on the microphone while recording is active. The best way to avoid this is to dictate at a steady volume with 3-5 inches of space between your mouth and the microphone. To alter your microphone’s listening level manually please open the control panel and navigate to the hardware and sound section. Alternatively, you can type, “Control Panel\Hardware and Sound”, into Windows Explorer. Open the manage audio devices window and open the recording tab. Double click on your microphone to open the microphone properties. Navigate to the levels tab and set the listening level to be between 75-90%.
Microphone Button Latency
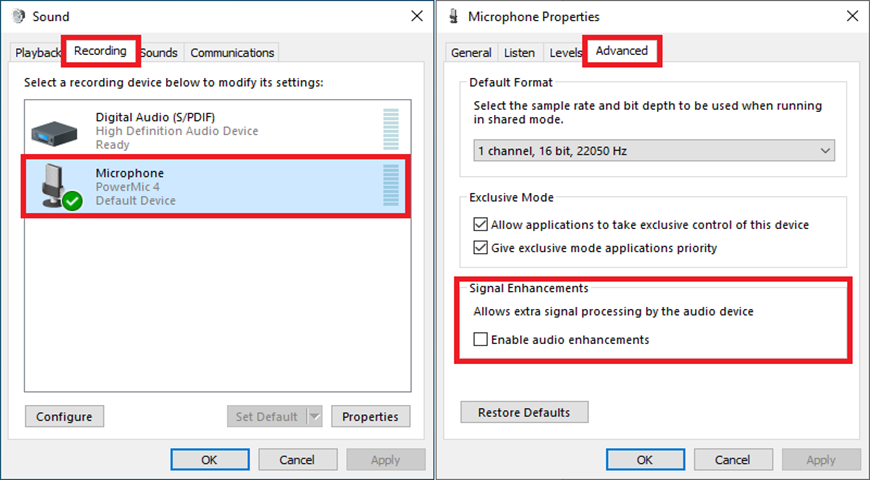
Signal Enhancements
Some manufacturers and sound cards have begun to enable a feature called, “signal enhancements”. This feature can be attributed to internal audio exceptions and latency in microphone button response. It is strongly recommended that this feature is disabled. To disable signal enhancements on your microphone please open the control panel and navigate to the hardware and sound section. Alternatively, you can type, “Control Panel\Hardware and Sound”, into Windows Explorer. Open the manage audio devices window and open the recording tab. Double click on your microphone to open the microphone properties. Navigate to the advanced tab and uncheck the option, “Enable audio enhancements”.
Microphone Not Available
Loose USB Connection
This issue is more common that you might believe, but a good number of support tickets have been solved by simply changing the USB port that the microphone is plugged into. Whether the port itself has become loose over time or the USB connector of the microphone cable has become loose it is always a good first step to reseat the connector in a new USB port.
Bad Microphone Cable
This is another common support ticket. Overtime the repeated bending and pinching of the microphone’s cable causes a fault to form in the cable. Some microphones (e.g., Nuance PowerMic) have cord replacement kits that can be used to resolve this issue. Otherwise, a new microphone is necessary.
Commands Quick Reference Sheet
Voice Command | Description |
Delete That | If text is currently selected, it will be deleted. |
Insert After {Word} | The cursor will be moved after the specified word. |
Insert Before {Word} | The cursor will be moved before the specified word. |
Manage Auto Texts | Opens the auto-text window. |
Manage Vocabulary | Opens the vocabulary window. |
New Line | Presses the return key. |
New Paragraph | Presses the return key twice. |
Next Field | Selects the next field found inside the text control. |
Previous Field | Selects the previous field found inside the text control. |
Resume With {Word} | Moves the cursor to the right of the specified word and deletes all text after the new position. |
Scratch That | If text is currently selected, that text will be deleted. Otherwise, it will delete the last utterance or word to the left of cursor. |
Select {A} to {B} | Will attempt to select the focused range of words in the focused text control (e.g., “Select patient to headache”). |
Select {Words} | Will attempt to select the specified words in the focused text control. |
Transfer Text | Will start the transfer of text from the dictation box to the focused text control. |
Undo That | The last performed action will be undone (e.g., the last insert will be removed). |
What Can I Say | Opens the What Can I Say window which shows all commands and auto-texts. |