CSpeak - What Can I Say?
Introduction
One of the most undervalued tools available to CSpeak users, the what-can-I-say (WCIS) window allows a user to modify and improve their auto-texts, vocabulary, and formatting settings. The purpose of this document is to help users understand the functions that are available to them through the WCIS window.
How to Access the What-Can-I-Say Window?
Speech Bar
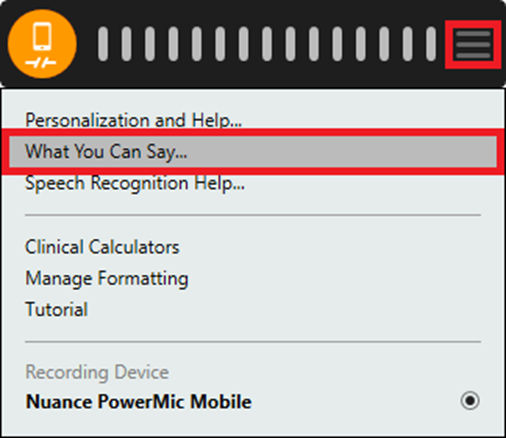
The WCIS window can be accessed directly from the speech bar. Once you have logged in and the speech bar appears you can click on the open context menu button and select the option, “What You Can Say…”.
Voice Command
The WCIS window can be accessed by voice command. The voice command is, “What Can I Say”.
Window Overview
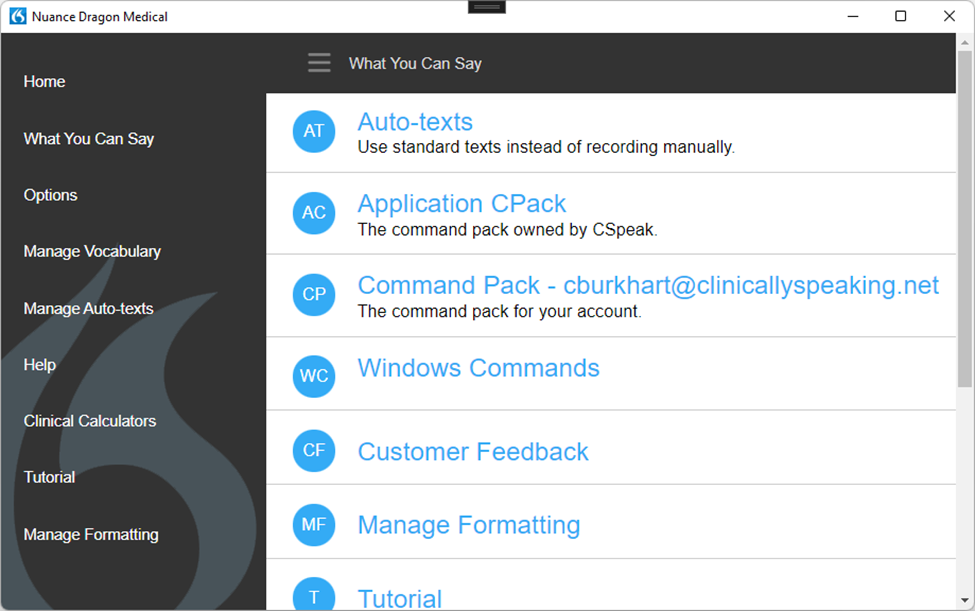
The WCIS window is broken up into a 2-column layout. The left column provides your navigation options and can be opened by clicking on the toggle button in the top left. The right column provides you with the content of the selected navigation option. By default, the navigation option, “what you can say”, is selected.
Navigation Options
Home
This content page will display the CSpeak resource center as if you were viewing it in your web browser. This field can be overridden at the organization level to allow users to be sent to the organization’s support center.
What You Can Say
This is the default content page. The right-hand column will provide you with a collection of navigation options to view your auto-texts, command packs, and many other content pages. This is a quick way to review the available auto-texts and commands available to you.
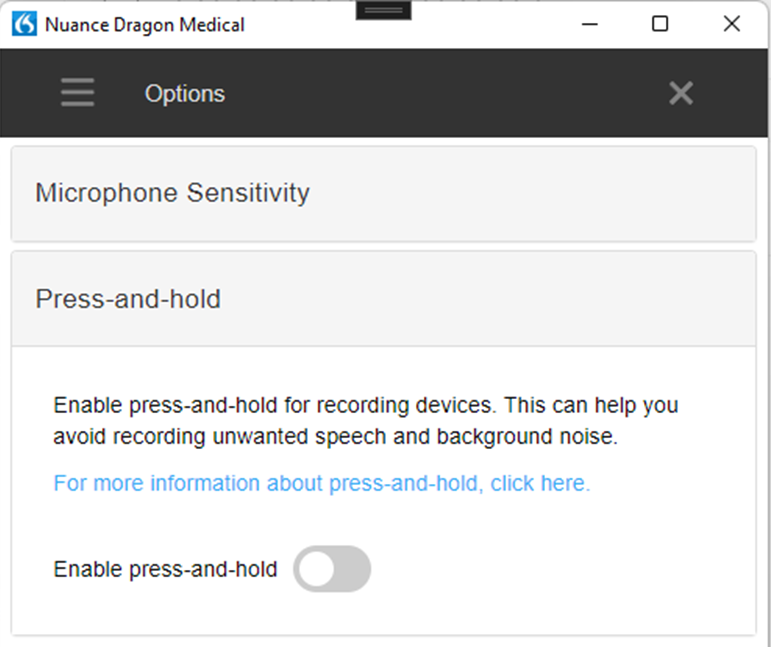
Options
This content page allows you to modify some of the functionality of your microphone. Currently the two available options are the microphone sensitivity and to enable press-and-hold recording. It is strongly recommended that you do not alter the microphone sensitivity unless directed by your support resource. Press-and-hold is available for providers who prefer that style of dictating as compared to the traditional press-to-toggle recording style.
Manage Vocabulary
This content page provides you with the ability to add custom words to your vocabulary. While the cloud recognition system is exceptionally accurate there are occasions where a word may need to be manually added to the vocabulary. In most cases the entry will be a name or a complete phrase that is unique.
Adding Word
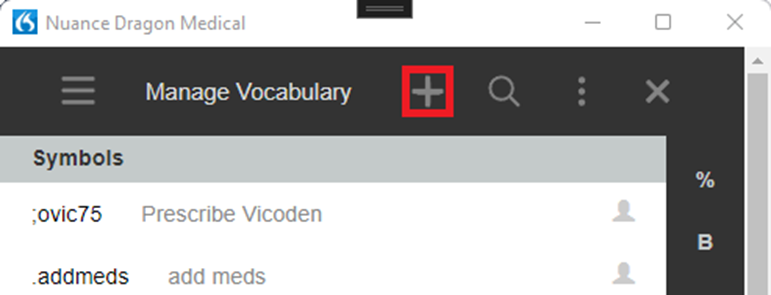
To add a word to the vocabulary, please click on the + button found in topmost menu bar.
On the add word content page, you can then add the new word and click the button, “Use Default Pronunciation”.
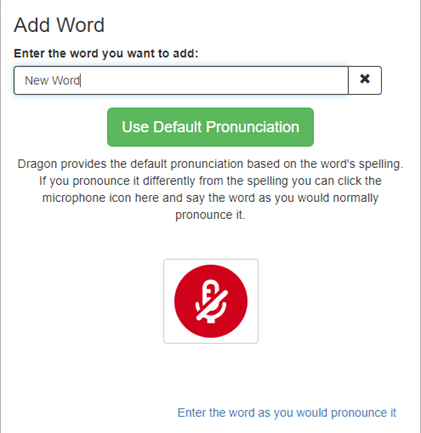
If the word is more complicated or if the user has a strong accent, they can try the record option or the option to, “enter the word as you would pronounce it”. If you choose the option to enter the word as it is pronounced, please keep in mind that you should enter the pronunciation form as it is pronounced. For example, the word, “IEEE”, would be pronounced, “I triple E”.
Modify Word
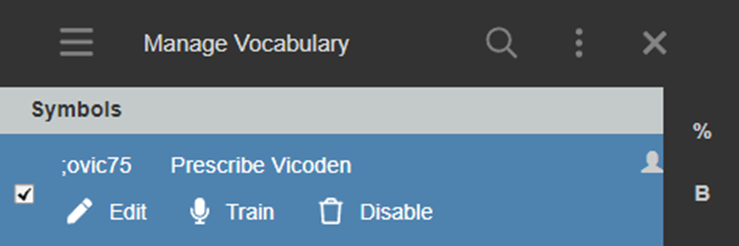
To modify a vocabulary entry all you must do is click on it. You will be presented with 3 options. The ability to edit the entry, the ability to train the entry, and the ability to disable the entry.
Text Macros
For EHRs that allow for text macros (e.g., A quick text in Centricity), one available workflow option is to add those text macro names as vocabulary entries. This acts as a pseudo-command that allows a quick and easily manageable command structure. The written form would be your text macro name and you would then add a pronounced form that matches the spoken phrases for the text macro.
Manage Auto-Texts
This content page will allow you to create and manage the list of auto-texts that you have in your account. You may also see some auto-texts that are owned by your organization. These auto-texts will not be editable in this editor. Any organization owned auto-texts must be managed in the Nuance Management Center.
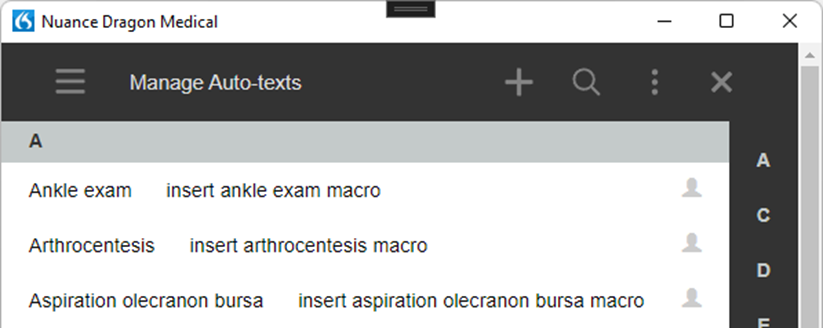
An auto-text is a voice enabled text macro. They are invoked by speaking a spoken phrase and the resulting content of the auto-text is then transferred to the text control. You can think of these as a built-in version of a text macro.
Add Auto-Text
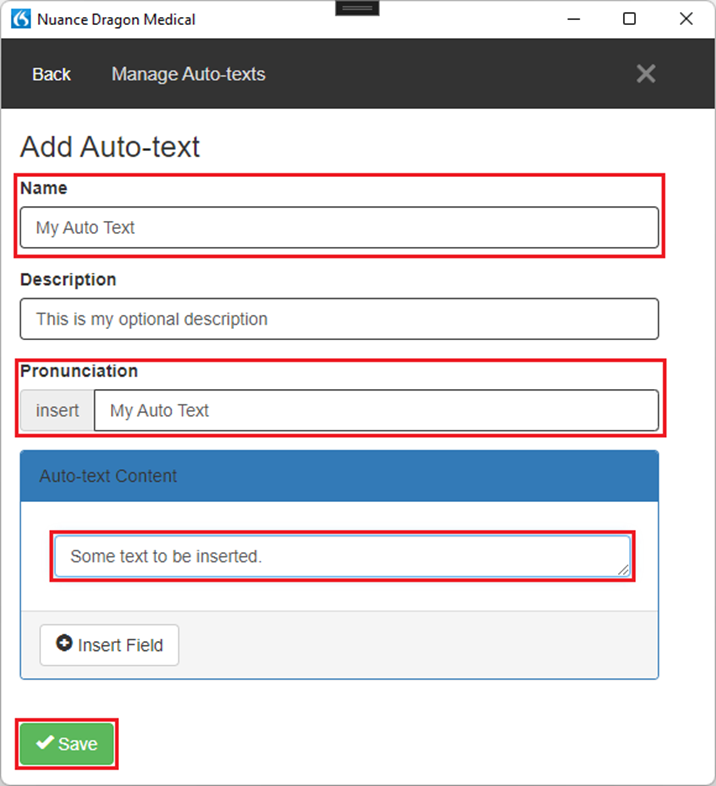
To add a new auto-text please click on the + button shown in the top menu bar.

On the add auto-text content page please insert the name, spoken phrases (aka pronunciation), and content for the auto-text. Optionally you can include a description for the auto-text. When you have completed the data entry, please click the save button.
Modify Auto-Text
To modify an auto-text you can click on the specific auto-text and select the edit button. This will take you to the modify auto-text content page and allow you to change any of the properties associated with the auto-text. When you are done, please click the save button at the bottom of the page.
Delete Auto-Texts
To delete an auto-text you can click on one or more auto-texts in the collection and press the delete button found in the top menu bar. This will delete all the auto-texts you have selected.
Auto-Text Fields
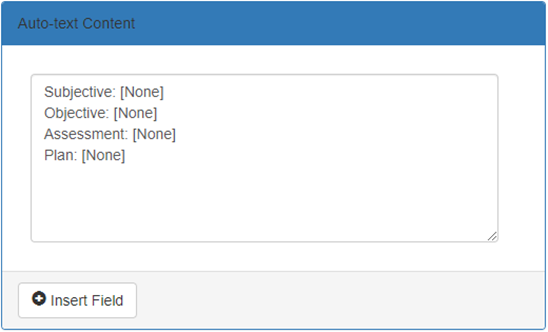
An auto-text can contain multiple fields that allow the user to navigate the text using their voice. Fields are defined using the [ and ] brackets. Fields can have default text inside of them. For example, “[A sample sentence]”. If correctly designed and full text control is available, the user can use the voice commands next field and previous field to move between the fields in the auto-text. These commands are also available as microphone buttons and hotkeys.
Additionally, the voice command, “field complete”, will accept the default value for the selected field. The voice command, “accept defaults”, will accept the default value for all remaining fields in the body of text.
Help
This content page provides some quick help articles for common dictation workflows. While this is a great resource for simple issues, please report technical issues to your support resource.
Clinical Calculators
The content page allows access to the clinical calculators module which is included with the Nuance Healthcare ID program. This feature is not generally available to Clinically Speaking users and requires additional licensing to access.
Tutorial
This content page will allow you to view the Dragon tutorial that you were presented with the first time you logged into the application.
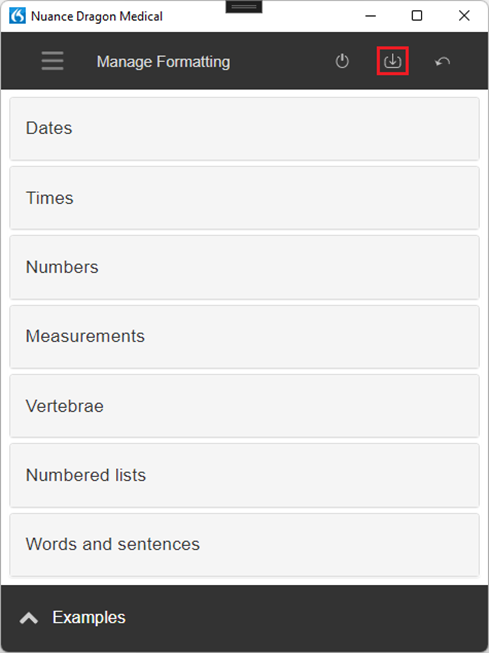
Manage Formatting
This content page allows you to alter the formatting for dates, times, numbers, measurements, vertebrae, numbered lists, words, and sentences. Please be careful when modifying this content page and if you make any changes, please make sure you click on the save button.